Friday, June 27, 2008

Scraplift

Over on the DSM forum there was a challenge choose someone's layout you really like and scraplift it. I loved this layout by Quinn:


And here is my spin on it:


I don't love it as much as I love Quinn's, but it was really fun and easy to just copy someone else! Everything I used came from Digital Scrapbook Memories' new "Family Ties" CD. I think they sold out at QVC.com, but they should be available soon at the DSM site.

{Oh Brother layout: papers, stars, tape, frames, & notebook alpha from DSM's Family Ties CD - "Teen" kit, stitching from DSM's Family Ties CD - "Baby" kit, "!Sketchy Times" font
Mess Queen layout: papers, alpha, border stitching & flowers from DSM's Playground CD, zigzag stitching from DSM's Collection Two CD, frames and tape from DSM's Oh Boy! CD}

Sunday, June 22, 2008

My Miles

Finally! It's been a while since I sat down and just scrapped some recent photos and wrote what was on my mind at the moment. I've got some other fun projects I'm doing, but they are taking a lot of time, so it was nice to take a break and create this layout. I did it for the "recipe challenge" over at Little Dreamer Designs.


{from LDD's "Lovey Dovey" collab kit: background paper by Lisa Warren, cream paper by Emily Merritt, heart paper by Leora Sanford; from LDD's "Good Times" collab kit: glitter heart by Michelle Coleman, alpha by Emily Merritt; border stitching and brown paper from Michelle Coleman's "Loveable" kit, zigzag stitches from Michelle Coleman's "Bohemian Summer" kit, brushes by Lauren Reid from LDD's "Hullaballoo" collab kit, "Pea Missy Cursive" and "Carbonated Gothic" fonts}

Sunday, June 8, 2008

Waiting Patiently...

... until I can download this!


(Only two more days until we can start unpacking.)
I just saw it over at GG Digital Designs, it's free :) Go here to pick it up for yourself.

Saturday, June 7, 2008

Hybrid Project: Mother's Day Minibook


(Front)


(Back)

I completed my very first hybrid project! For those that don't know, hybrid scrapbooking is a combination of digital and traditional paper scrapbooking. I decided to make mini-albums for my mother and mother-in-law for Mother's Day this year.

I went to Michael's and found this little chipboard tag album.

Once I had that album, I took the measurements and just created a canvas in Photoshop Elements 5.0 the same size. (I actually just created a rectangular canvas first, and then cut out the corners later to make the tag shape.)

Then I created my pages... just some cute little shots of my boys. Everything used to create these pages comes from Digital Scrapbook Memorie's Moods CD.


Once I finished creating my pages, I transferred them to an 8.5x11 canvas which fit three on a page. I then had them printed (you could do this at home, I didn't because I get better quality at Staples), and cut them out.

And finally I just put some double sided tape on the back and some mod podge over the top, added some ribbon, and ta da!

So even if you aren't a huge scrapbooker, you can use your computer to create all kinds of fun little things. I especially love chipboard, but little acrylic albums are fun as well. Also mod podging things onto tile is another great look. The possiblities really are endless! It may have been my first hybrid project, but certainly not my last.

{papers and elements from Digital Scrapbook Memories "Moods" CD, "Zebra", "SF Happiness", "Smudgers", "Pea Olson"& "Times New Roman" fonts}

Friday, June 6, 2008

Beginner Classes

If you want to get started with digital, two FREE beginner online classes have just been scheduled for June & July over at Digital Scrapbook Memories. Go here to check out the schedule and sign up. :D

Wednesday, June 4, 2008

I'm Back (sort of...)

So in case you were wondering whether or not I fell of the face of the Earth... well, yeah. At least the scrapbooking end of it. Moving has thrown a pretty big wrench into things, and it looks like that ordeal won't be over until late next week. Also having family in town for the graduation festivites slowed me up a bit (scrapbooking-wise).

For now, I leave you with the fun news that I won a challenge! Remember this page? You can click over to the Little Dreamer Designs Blog to see it featured. So that's fun!

I also have another post in the works about a fun little hybird project I did, so if I ever get to finishing writing about it I'll get that up too.

Plus I have been working on another fun little project, that I'll announce later as I don't yet know if it will pan out...

So more is coming (someday) - I promise! It has too, before I go competely crazy without access to my desktop & photoshop!

Wednesday, May 7, 2008

Creating Realistic Layouts Using Drop Shadows

***The following is my number one tip to anyone learning about digital scrapbooking.***

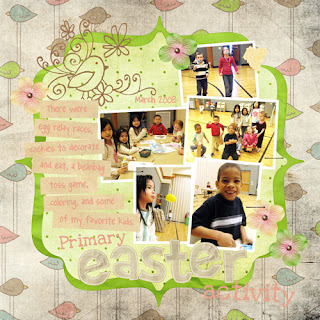
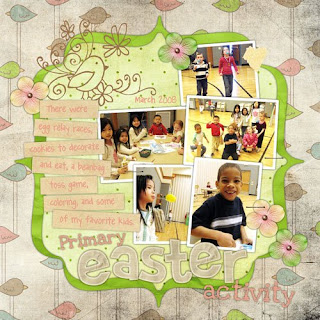
Take a look at these two layouts:


At first glance they may look the same, but if you look closely can you tell which one looks more realistic? You might notice that the second one has more depth and looks more like a paper scrapbook page would. This is because I applied drop shadows to the photos and most of the embellishments.

In Photoshop Elements you can apply a drop shadow to any layer.

1. Drop shadows are found just above your layers palette, in the section titled "Artwork and Effects". (This is what it is called in PSE 5.0, in other versions it may be called something different but it will be in the same place.) You will notice two drop down menus.
- For the one on the left, select "Layer Styles".
- For the one on the right, select "Drop Shadows".
You should then see six (or so) different boxes that give examples of drop shadows.

2. To apply a drop shadow to one of your layers, whether it be text, paper, or embellishment, make sure the layer you want is selected in your layers palette.

3. Now go up to your drop shadows. The only one I ever use is "LOW". You can a) click once and then go down a bit and click "apply", or b) double click on the drop shadow box. Your layer will have gone from this:
(no shadow, no depth)
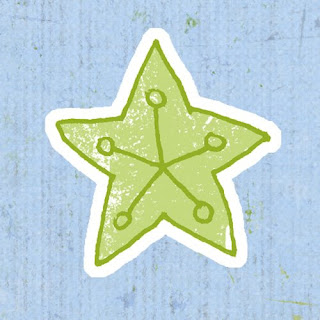

to this:
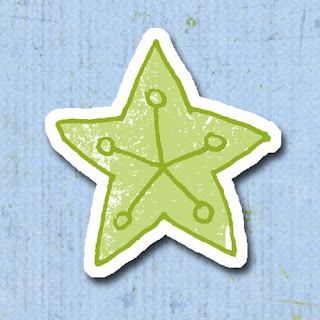


But as you can probably tell, this doesn't exactly look realistic either. It makes it look like the star is sort of "floating" above the paper, rather than attached to it. So let's keep playing with it.

4. You will notice in your layers palette that the layer you applied the shadow to now has a small icon on the right side. (In PSE 5.0 it looks like a little white sunburst.) Double click on the little icon.

5. A new window will open that gives you all kinds of options for customizing your shadow. The main thing I focus on is "Distance". You will see it has a slider and a box with a number. The default is 21. I usually change this number to 0. Here's the result:
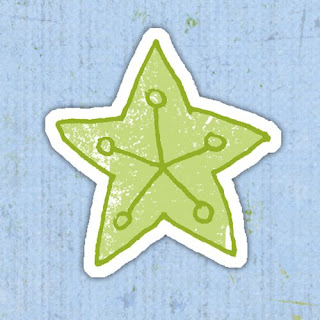


Now there is a hint of shadow but it looks like the star is now actually glued or attached to the paper. You don't have to set your distance to 0, but it is the number I use 95% of the time. If I ever choose another number, it is usually below 6. But play around with the slider or different numbers to get the effect you like.

Also, there are a few other options you can play with other than distance. You will notice there are sliders for size & opacity as well. I generally don't mess with these, but sometimes I reduce the opacity. Again, just play around until you get what you like. There is also the lighting angle at the top of the window. Sometimes I change this, but as you reduce your distance it doesn't really matter what you lighting angle is, the shadow will look pretty much the same.

Like I said, this is my number one tip for digital scrapbooking. So many digital layouts look so flat, but adding drop shadows gives it that realistic look with depth that you get with traditional scrapbooking.

{Easter layout credits: bird paper, green paper, flowers and bracket frame by Bren Boone, brads from Amy Teets' "Sunporch" kit, kraft paper (cut into strips), alpha, yellow tape & staples by Shabby Princess, chick doodle by Victoria Greenlees, "Love Ya Like A Sister" & "Pea Angedawn" fonts}