I just got the DSM's new "Oh Boy!" CD in the mail and here is my first creation with it:
You can check out the new CD here - just click on the CD cover to view all five kits... I love them all! I can't wait to do more. These pictures are from last summer's annual LeBaron family camp out in Utah.
{Everything from Digital Scrapbook Memories "Oh Boy!" CD, "All Natural" kit, "Pea Glo-Girl Script" font}
Friday, February 29, 2008
Friday, February 22, 2008
Happy Anniversary
I don't have many layouts about KC and I - our wedding photos aren't even done! Yikes. Anyway, I guess this is a start. We celebrated our fifth anniversary in December, while we were in Las Vegas. We drove out to the Hoover Dam (where he proposed) and had a romantically wonderful time. I took pictures of the pretty desert at dusk - I miss it.
{background paper by Miriam Lima, frame by Katie Pertiet, stitching & leaves by Shabby Princess, white flower by Gina Cabrera, doodle hearts by Summer Driggs, "Pea Missy Cursive" & "SF Happiness" fonts.}
Monday, February 18, 2008
Cake
My baby is one! Isn't he cute?
{Everything from Digital Scrapbook Memories "Beginner Series: Flower Patch" CD, "RubThis!" font}
Saturday, February 16, 2008
I *heart* my bubble train
If I had to pick one designer as my favorite, it would be Michelle Coleman. I don't know if I can pinpoint exactly what it is about her stuff, but I absolutely LOVE everything she creates. It's always clean, cute, trend-conscious, and super high quality. This whole layout was created using her "Wild Sorbet" kit - which you can pick up for FREE here - except the stamped alpha... but you can also get that for FREE over here.
{everything from Michelle Coleman's "Wild Sorbet" kit, stamped alpha by Michelle Coleman, "ButterBrotPapier" and "MA Sexy" fonts}
Happy Sleep, again
This is what it will look like printed - I always create two page layouts at 24x12, then crop each side to 12x12 before printing so it will fit in a scrapbook. So when creating a page like this you always have to be conscious of where the cut will be so you don't have text or someone's face cropped in half. Just thought I'd post it like this because you can see it so much better this way.
Happy Sleep
As I was browsing through pictures I thought to myself, "Man, we sure have a lot of sleeping pictures... what will I do with those?" And, like any good scrapbooker, I answered my question with the following:
Another two-pager! It was fun to make this collage-y layout. I love "concept" layouts that defy the normal constraints of chronology. (Did that sentence make any sense? It's way too late for me to be posting.) Basically I mean here's a bunch of pictures spanning five years, all tied together by sleep. The journaling reads: "Ever since KC and I established our family in 2002, we LOVE to take pictures of each other sleeping! It doesn't matter how: a nap on the couch, sleeping in on a Saturday, snuggling a newborn (even while nursing!), or those funny times in the high chair or while grocery shopping. For some reason, we can't resist grabbing the camera and snapping a pic of another sleeping beauty!"
{seafoam paper by Michelle Coleman, pattern paper by Ronna Penner, paper moon & happy chipboard by Gina Cabrera, photo turn by ScrapKuts, paper stars, staples, star border by Miss Mint at Peppermint Creative, scallop edge by Digital Scrapbook Memories "Collection Two" CD, "Pharmacy", "Burst My Bubble", and "JBCursive" fonts.}
Wednesday, February 13, 2008
My Favorite Valentines
I created a Valentine-themed header for my other blog, and then decided to turn it into a page! This was fairly quick since I already had the basic design from my header.
{pink paper and swirls from Digital Scrapbook Memories "Moods" CD, stamp cluster by Lindsay Jane Designs, painted heart, glitter kiss, & stamped alpha by Michelle Coleman, cream paper by Ellie Lash, paper tears by Pineapple Plantation Designs, "Windsong" and "Jane Austen" fonts.}
Sunday, February 3, 2008
Random Memories
I found a template at Moriginals that I thought would be great for a "look back" at some favorite memories of 2007. Scrapping with a template is quick and easy, and great when you are feeling creatively challenged. (You can read how to use a template here.)
{background papers & paper cut as flowers & label by Miriam Lima, ribbon by Lemonaid Lucy, stitched tag by Melany Violette, "remember" rub on by Tia Bennett, "2007" rub on by Gina Cabrera, number gels by Shabby Princess, "Pauhlino Pedra Azul", "Marcelle Script" & "SwingSet BB" fonts}
Saturday, February 2, 2008
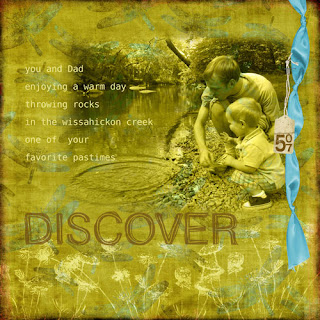
Discover
I recently learned how to blend a photo into the paper, like so:
It was super easy and I love how it turned out. Here's how:
1. Open you paper and photo, and drag your photo onto your paper.
2. At the top of your layers palette, there is a drop down menu that should say "normal". Pull the menu up and change it to "luminosity".
3. Select your eraser tool. In the options bar (at the top of the screen) you should see a pull down menu where you can select a brush. A fuzzy brush works best for this. Also, I reduced the opacity to about 75%.
4. Once you've selected your eraser brush, size and opacity, just start erasing around the edges to give it the blended look. Voila!
{paper & tag by Corina Nielson, knotted ribbon by Michelle Coleman, date stamp from Digital Scrapbook Memories "Moods" CD, "Father Nelson" & "Lucida Console" fonts}
Subscribe to:
Posts (Atom)